
Those are some of my notes on writing a simple android app using IntelliJ IDEA Ultimate.
Initially we need Java SDK (1.7 is preferred, since Gradle and the Android SDK does not officially support builds with 1.8 as of the time of writing and there are some issues with it) and the Android SDK
By setting up the gradle plugin we can get (almost) instantaneous support for earlier versions of Android.
In the SDK there are few major pointers:
- SDK Manager (to download additional packages, in the MACOSX Pakage is in the tools folder)
- AVD Manager (to set up and add more Android Virtual Devices)
- Platform-tools (Android Debug Bridge, SQLite3, etc.)
- Extras (Those are the needed support libraries older versions of Android)
We need to download all the needed packages via the SDK Manager:
$ cd /Users/andrey.voev/android-sdk-macosx/tools/
$ ./android
In my case I went with the bare minimum: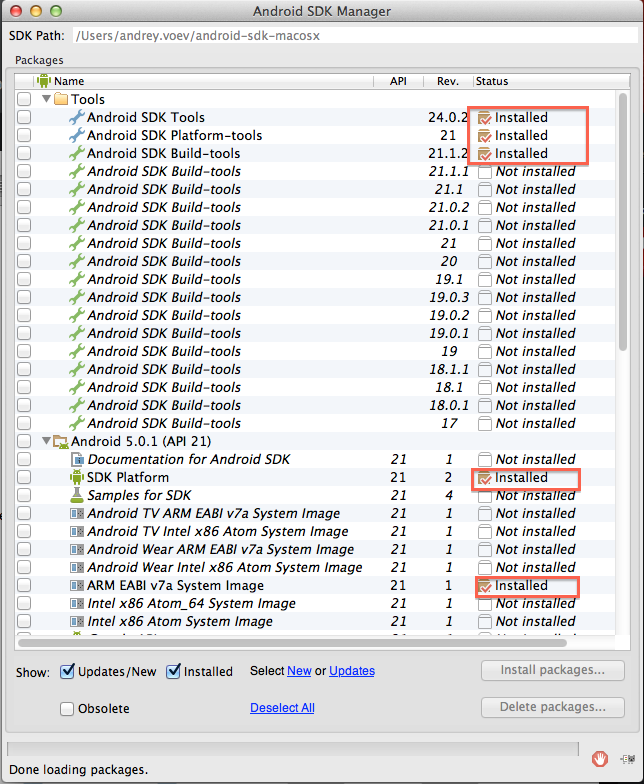
If you are using Windows, make sure to run the SDK Manager as an Admin to avoid some package installation problems.
And set up an AVD:
$ cd /Users/andrey.voev/android-sdk-macosx/tools/
$ ./android avd

Android comes with different API support levels, and usually the higher the API Support level, the better. I am using API 21 (Lollipop) here. The only drawback in selecting the highest API level is that there may be some backwards incompatibility with older Android versions if you are using the newest API, but Gradle and IntelliJ are very good with figuring those out for you.
In IntelliJ go for File->New Project->Android->Gradle: Android Module (If you don’t have Gradle yet, the IDE will download and install it for you). From here you can select which previous versions of Android you want to support. My best bet was API 11+, since supporting older devices means that you need to do (sometimes major) additional work. I’ve selected the “Create Activity” to save some typing for the initial functionality. Select “Blank Activity” on the next screen and leave the default values of “MainActivity” and “activity_main” on the screen after that.
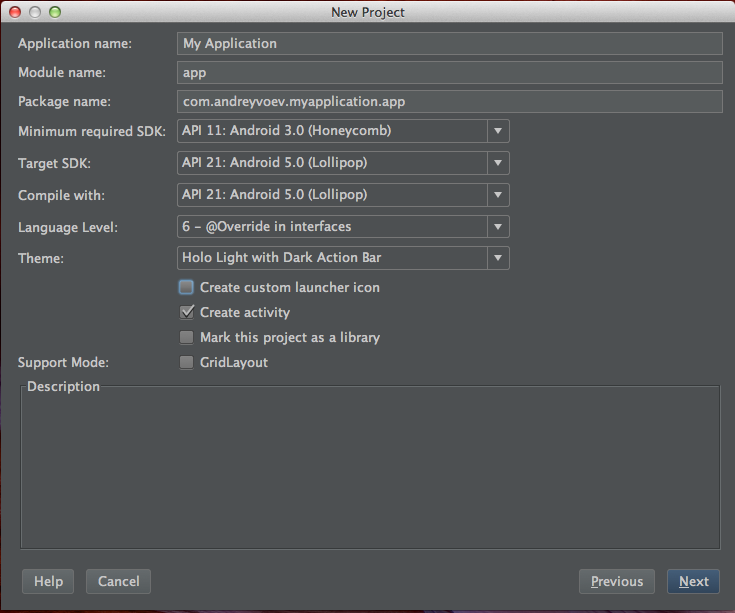
The last screen will ask for name and location of the App. Make sure to select a location to which you have sufficient privileges as well. Gradle will create the project structure and the main activity.
Few important pointers:
- src/main/AndroidManifest.xml – This is where most of the app settings are located. Name, icons, intents and all that can be changed from here.
- com/andreyvoev/myapplication/app/MainActivity.java – Where the initial action takes place. This is the location to which we will be adding logic.
- layout/activity_main.xml – The visual representation of our MainActivity.java
- values/strings.xml – We keep all the text values here, to make the App textual content to be modified and translated easy.
- menu/menu_main.xml – The menu options.
Let’s add some functionality to the application(the added code is in green):
1. “Exit” option to the menu:
<menu xmlns:android="http://schemas.android.com/apk/res/android"
      xmlns:app="http://schemas.android.com/apk/res-auto"
      xmlns:tools="http://schemas.android.com/tools"
      tools:context=".MainActivity">

      <item android:id="@+id/action_settings"
            android:title="@string/action_settings"
            android:orderInCategory="100"
            app:showAsAction="never"/>

      <item android:id="@+id/action_exit"
            android:title="@string/action_exit"
            android:orderInCategory="200"
            app:showAsAction="never"/>

</menu>
Where android:title=”@string/action_exit” sets the value for the action which will be defined below (almost everything that has the “@” annotation is a reference to some resource of the android framework). As you can see, the “Settings” menu is already generated for us, along with all the proper references throughout the app.
<?xml version="1.0" encoding="utf-8"?>
<resources>

    <string name="app_name">My Application</string>
    <string name="hello_world">Hello world!</string>
    <string name="action_settings">Settings</string>
    <string name="action_exit">Exit</string>

</resources>
package com.andreyvoev.myapplication.app;

import android.support.v7.app.ActionBarActivity;
import android.os.Bundle;
import android.view.Menu;
import android.view.MenuItem;

public class MainActivity extends ActionBarActivity {

    @Override
    protected void onCreate(Bundle savedInstanceState) {
        super.onCreate(savedInstanceState);
        setContentView(R.layout.activity_main);
    }

    @Override
    public boolean onCreateOptionsMenu(Menu menu) {
        // Inflate the menu; this adds items to the action bar if it is present.
        getMenuInflater().inflate(R.menu.menu_main, menu);
        return true;
    }

    @Override
    public boolean onOptionsItemSelected(MenuItem item) {
        int id = item.getItemId();

        // Handle presses on the action bar items
        switch (id) {
            case R.id.action_exit:
                finish();
                return true;
            default:
                return super.onOptionsItemSelected(item);
        }
    }
}
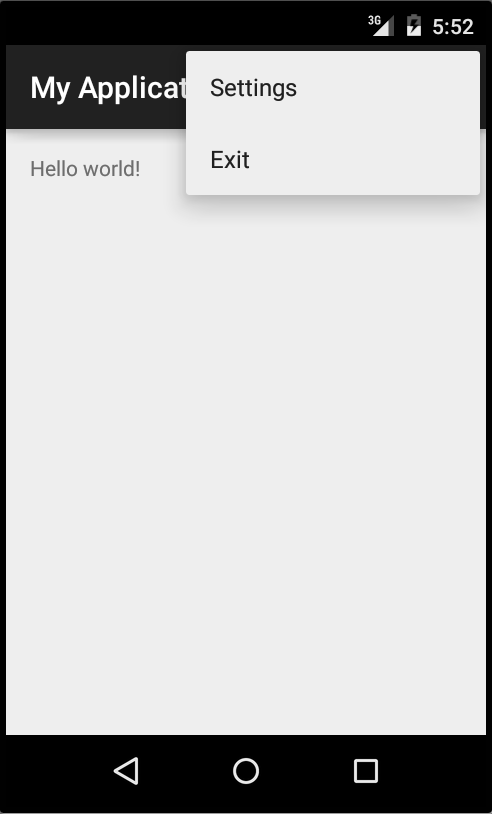
and this is the end result
2. New Add Item screen / activity and option to the menu:
There is a shortcut for creating a new action in the IDE – All you need to do is right-click on any folder in the project structure and select New->Activity->Blank Activity 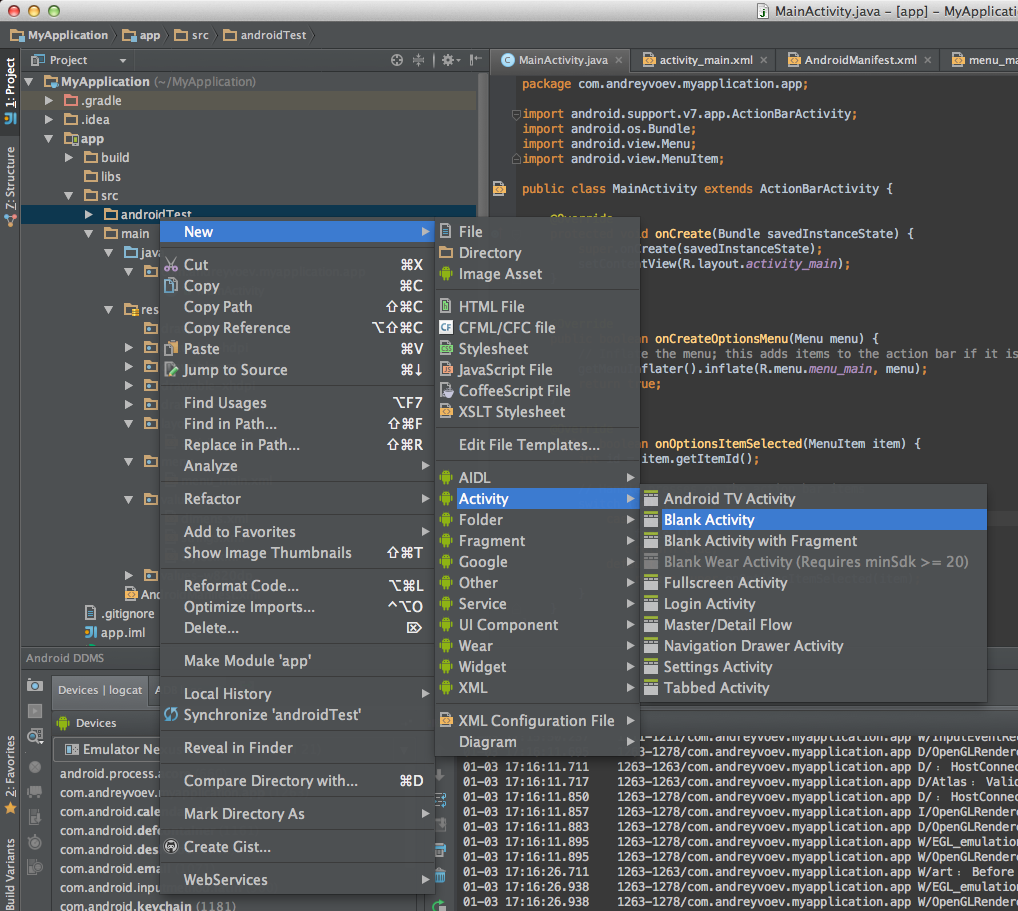
Select the name of the activity and the parent here
Using the option above will create the corresponding files:
com/andreyvoev/myapplication/app/AddItem.java
layout/activity_add_item.xml
menu/menu_add_item.xml
and entries in
values/strings.xml
src/main/AndroidManifest.xml
Let’s add the “Add Item” to the menu as well:
<menu xmlns:android="http://schemas.android.com/apk/res/android"
      xmlns:app="http://schemas.android.com/apk/res-auto"
      xmlns:tools="http://schemas.android.com/tools"
      tools:context=".MainActivity">

      <item android:id="@+id/action_add_item"
            android:icon="@android:drawable/ic_menu_add"
            android:title="@string/title_activity_add_item"
            android:orderInCategory="100"
            app:showAsAction="ifRoom"/>

      <item android:id="@+id/action_settings"
            android:title="@string/action_settings"
            android:orderInCategory="100"
            app:showAsAction="never"/>

      <item android:id="@+id/action_exit"
            android:title="@string/action_exit"
            android:orderInCategory="200"
            app:showAsAction="never"/>

</menu>
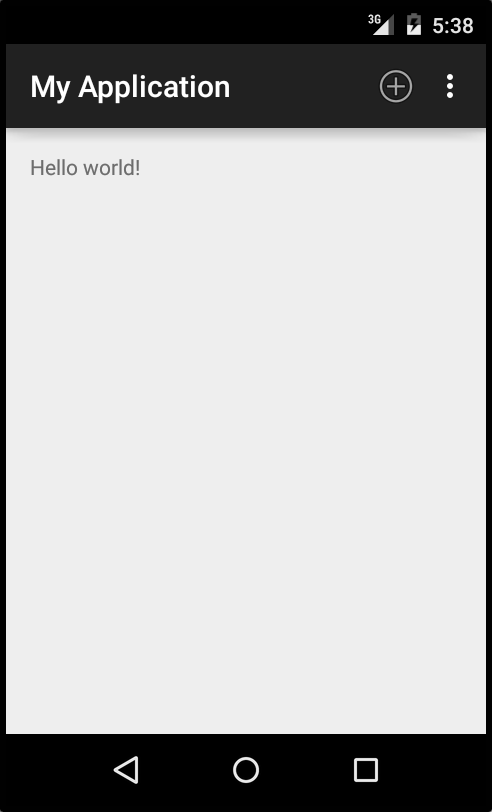
The difference here is that we’ve used android:icon=”@android:drawable/ic_menu_add” to display the option as an icon and app:showAsAction=”ifRoom” to show the icon in the Action Bar instead as a part of the drop-down menu. We are using the generated android:title=”@string/title_activity_add_item” as a title.
This is how it looks so far:
The next thing that we need to do is to associate the newly created activity to an action
package com.andreyvoev.myapplication.app;

import android.content.Intent;
import android.support.v7.app.ActionBarActivity;
import android.os.Bundle;
import android.view.Menu;
import android.view.MenuItem;

public class MainActivity extends ActionBarActivity {

    @Override
    protected void onCreate(Bundle savedInstanceState) {
        super.onCreate(savedInstanceState);
        setContentView(R.layout.activity_main);
    }

    @Override
    public boolean onCreateOptionsMenu(Menu menu) {
        // Inflate the menu; this adds items to the action bar if it is present.
        getMenuInflater().inflate(R.menu.menu_main, menu);
        return true;
    }

    @Override
    public boolean onOptionsItemSelected(MenuItem item) {
        int id = item.getItemId();

        // Handle presses on the action bar items
        switch (id) {
            case R.id.action_add_item:
                addItem();
                return true;
            case R.id.action_exit:
                finish();
                return true;
            default:
                return super.onOptionsItemSelected(item);
        }
    }

    /** Called when the user clicks the Add Item button */
    public void addItem () {
        Intent intent = new Intent(this, AddItem.class);
        startActivity(intent);
    }
}
and finally let’s change the text in the generated layout/activity_add_item.xml
<RelativeLayout xmlns:android="http://schemas.android.com/apk/res/android"
                xmlns:tools="http://schemas.android.com/tools"
                android:layout_width="match_parent"
                android:layout_height="match_parent"
                android:paddingLeft="@dimen/activity_horizontal_margin"
                android:paddingRight="@dimen/activity_horizontal_margin"
                android:paddingTop="@dimen/activity_vertical_margin"
                android:paddingBottom="@dimen/activity_vertical_margin"
                tools:context="com.andreyvoev.myapplication.app.AddItem">

    <TextView
            android:text="@string/add_item_text"
            android:layout_width="wrap_content"
            android:layout_height="wrap_content"/>

</RelativeLayout>
<?xml version="1.0" encoding="utf-8"?>
<resources>

    <string name="app_name">My Application</string>
    <string name="hello_world">Hello world!</string>
    <string name="action_settings">Settings</string>
    <string name="action_exit">Exit</string>
    <string name="title_activity_add_item">Add Item</string>
    <string name="add_item_text">Add item text</string>

</resources>
Which will lead to this screen after we click on “Add Item”: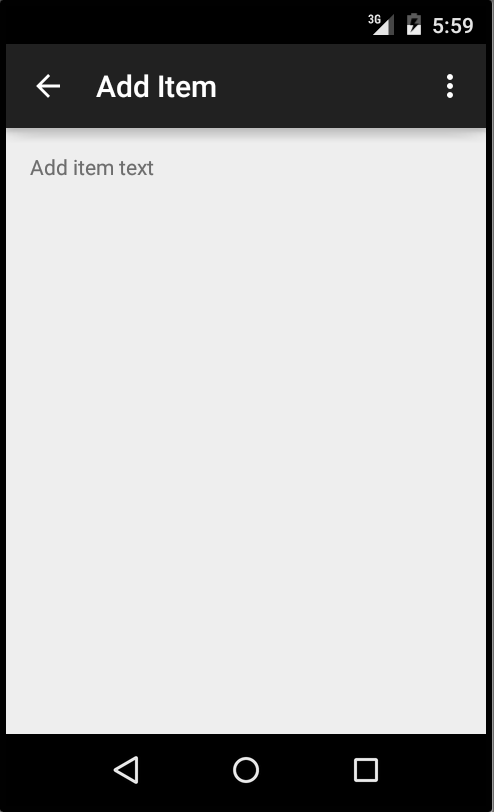
Resources:
http://developer.android.com/training/index.html
